安装或更新 Android Studio
在开始用 Jetpack Compose 来编写软件之前,我们需要
1. 一台可以联网的电脑
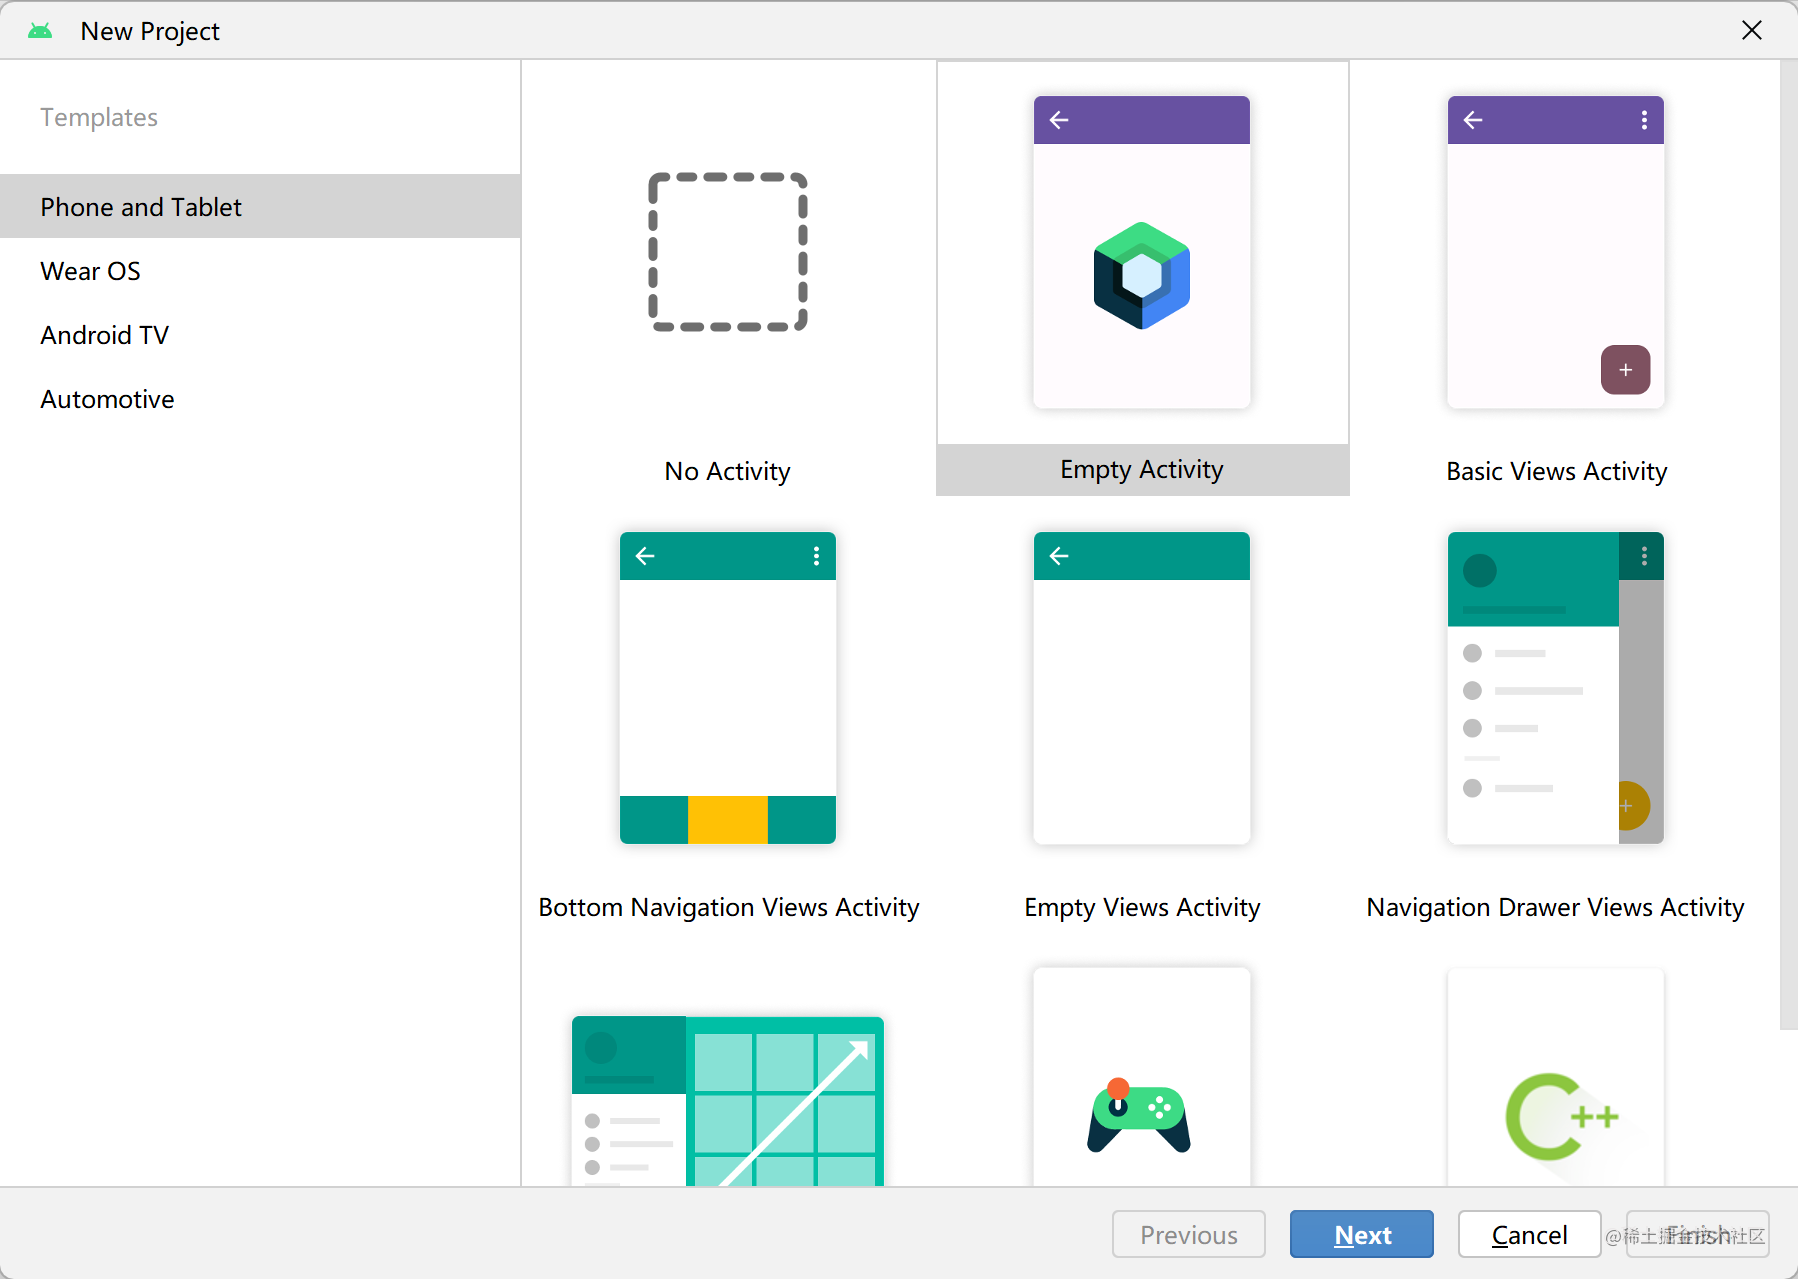
2. 安装或更新到 最新版的 Android Studio
3. 选择创建 Empty Activity 
如果你使用的 Android Studio 版本较旧,可能会看见多个 Compose 模板,请选择
Empty Compose Activity (M3)
4. 保持版本更新
尝试使用最新的 Compose 稳定版 和所要求的 Kotlin 版本
Gradle 版本: 7.2
可手动在 gradle-wrapper.properties 中更新
distributionUrl=https\://services.gradle.org/distributions/gradle-7.2-bin.zip
- build.gradle
- build.gradle.kts
buildscript {
    ext {
        compose_version = '1.3.1'
        kotlin_version = "1.7.10"
    }
    repositories {
        google()
        mavenCentral()
    }
    dependencies {
        classpath "com.android.tools.build:gradle:7.1.3"
        classpath "org.jetbrains.kotlin:kotlin-gradle-plugin:$kotlin_version"
    }
}
buildscript {

    val compose_version by extra("1.3.1") // Compose 稳定版
    val kotlin_version by extra("1.7.10") // 对应的 Kotlin 版本

    repositories {
        google()
        mavenCentral()
    }
    dependencies {
        classpath("com.android.tools.build:gradle:7.1.3")
        // 注意:Compose 版本有时候需要要求 Kotlin 到达一定的版本,请同步更新
        classpath("org.jetbrains.kotlin:kotlin-gradle-plugin:$kotlin_version")
    }
}
5. 配置 Gradle(可忽略)
您需要将应用的最低 API 级别设置为 21 或更高级别,并在应用的 build.gradle 文件中启用 Jetpack Compose,如下所示。
plugins {
    id 'com.android.application'
    id 'org.jetbrains.kotlin.android'
}

android {
    compileSdk 31

    defaultConfig {
        applicationId "yourAppId"
        minSdk 21
        targetSdk 31
        versionCode 1
        versionName "1.0"

        testInstrumentationRunner "androidx.test.runner.AndroidJUnitRunner"
        vectorDrawables {
            useSupportLibrary true
        }
    }

    buildTypes {
        release {
            minifyEnabled false
            proguardFiles getDefaultProguardFile('proguard-android-optimize.txt'), 'proguard-rules.pro'
        }
    }
    compileOptions {
        sourceCompatibility JavaVersion.VERSION_1_8
        targetCompatibility JavaVersion.VERSION_1_8
    }
    kotlinOptions {
        jvmTarget = '1.8'
    }
    buildFeatures {
        compose true
    }
    composeOptions {
        kotlinCompilerExtensionVersion compose_version
    }
    packagingOptions {
        resources {
            excludes += '/META-INF/{AL2.0,LGPL2.1}'
        }
    }
}

dependencies {
    implementation 'androidx.core:core-ktx:1.6.0'
    implementation "androidx.compose.ui:ui:$compose_version"
    implementation "androidx.compose.material:material:$compose_version"
    implementation "androidx.compose.ui:ui-tooling-preview:$compose_version"
    implementation 'androidx.lifecycle:lifecycle-runtime-ktx:2.3.1'
    implementation 'androidx.activity:activity-compose:1.3.1'
    testImplementation 'junit:junit:4.13.2'
    androidTestImplementation 'androidx.test.ext:junit:1.1.3'
    androidTestImplementation 'androidx.test.espresso:espresso-core:3.4.0'
    androidTestImplementation "androidx.compose.ui:ui-test-junit4:$compose_version"
    debugImplementation "androidx.compose.ui:ui-tooling:$compose_version"
}
需要注意的是,如果你使用的 Jetpack Compose 版本不是稳定版而是最新版的时候,Compose Compiler 版本通常会和 ui, animation 等版本不一致,你需要在应用的 gradle 文件单独设置最新的编译器版本,否则会发生编译错误.
android {
    buildFeatures {
        compose true
    }

    composeOptions {
        kotlinCompilerExtensionVersion = "1.3.0-rc01" // 单独设置 Compose Compiler 版本
    }

    kotlinOptions {
        jvmTarget = "1.8"
    }
}
使用 BOM
自 Jetpack Compose 1.3.0 起,Google 提供了 Compose BOM(Bill of Materials)用于快速指定版本。
BOM 是一个 Maven 模块,它声明一组库和版本的对应关系,将能极大地简化你在 Gradle 依赖块中定义 Compose 库版本的方式。您现在只需要定义一个 BOM 版本,就可以同时指定所有的 Compose 库版本,而不是分别定义每个版本(当库版本开始不同时,这可能会变得很麻烦并且容易出错)。每当 Compose 有一个新的稳定版本时,我们都将发布一个新的 BOM 版本,因此从稳定版本迁移到新的稳定版本将会十分轻松
具体来说,当你在 build.gradle 中引入 BOM 后
// Import the Compose BOM
implementation platform('androidx.compose:compose-bom:2022.11.00')
再引入其它 Compose 相关的库就不需要手动指定版本号了,它们会由 BOM 指定
implementation "androidx.compose.ui:ui"
implementation "androidx.compose.material:material"
implementation "androidx.compose.ui:ui-tooling-preview"
BOM 指定的版本都是稳定版,你也可以选择覆写部分版本到 alpha 版本,如下:
// Override Material Design 3 library version with a pre-release version
implementation 'androidx.compose.material3:material3:1.1.0-alpha01'
需要注意的是,这样可能会使部分其它的 Compose 库也升级为对应的 alpha 版本,以确保兼容性。
BOM 和 库版本 的映射可以在 Quick start | Jetpack Compose | Android Developers 找到,
6. 编写第一个 Compose 程序
现在,如果一切都正常,我们可以看到,MainActivity.kt 上显示以下代码
class MainActivity : ComponentActivity() {
    override fun onCreate(savedInstanceState: Bundle?) {
        super.onCreate(savedInstanceState)
        setContent {
            MyApplicationTheme { // 注意:这里会根据你创建的项目名而不同
                // A surface container using the 'background' color from the theme
                Surface(color = MaterialTheme.colors.background) {
                    Greeting("Android") // ①
                }
            }
        }
    }
}

@Composable
fun Greeting(name: String) {
    Text(text = "Hello $name!")
}

@Preview(showBackground = true)
@Composable
fun DefaultPreview() {
    MyApplicationTheme {
        Greeting("Android")
    }
}
您可以尝试编译运行此项目,以确保各类环境已安装成功。在此基础上,您也可以尝试修改 ①处字符串 "Android" 为其他值,在 debug 模式及较新的 Android Studio 版本下,您将看到修改实时显示到应用程序上——这是 Android Studio 提供的 字面量编辑 支持。您可以之后参阅 官方文档 以了解更多。
现在,我们将 MainActivity.kt 修改成以下:
class MainActivity : ComponentActivity() {
    override fun onCreate(savedInstanceState: Bundle?) {
        super.onCreate(savedInstanceState)
        setContent {

        }
    }
}
在下一节的教程中,你将会通过添加不同的元素来构建一个简单的 app